You cognise that workweek between Christmas and New Year ’s when it feel like metre is dilating and contract at the same time ?
When you need to do something but you ca n’t on the nose pinpoint what and why you should do it ? And you experience like the slowed down pace of life is equally relaxing and formidable ?
As a nurseryman , I experience the same kind of secular no - man ’s soil between the end of November and the end of February .

Every root section can turn into a new plant.
The spring bulbsare neatly tuck in the ground . Whatever perennial call for a pruning pay back one earlier in the fall . And I ’ve already mulch my molding for the winter and pull in all the numb parting of the time of year .
Yet , I still want to spend time out in the garden , and I ’m spoil for a safe apology to be out there in the cold , moist and gray conditions .
Combine this feeling with the fact that nothing prompt me more than making more plants from my subsist breed , and I ’ve found my grounds to go out into my garden in December : multiplication .

But can you really propagate plants in the winter?
Yes , my equally hermit booster , you’re able to . you may propagate plant by taking root cuttings in the wintertime .
If you think this is some kind of out of the question sorcery , you ’ve clear never tried to remove a mint plant only to have it resprout from small segment of source give behind .
basically , when we take etymon clipping , we ’re mime what nature does when it institutionalise runners that re - sprout a few metrical unit away from the female parent - flora . The beauty of propagate this way is that it ’s not just for plant that post runners . ( I ’ll elaborate more on this below . )

Every root section can turn into a new plant.
Why should I bother with root cuttings?
Yes , I understand the confusion . Why should we even bother with taking root cuttings when there are more straightforward ways to spread industrial plant , such as read press cutting , divisionandstarting them from seed ?
We ’ve already enshroud all of these methods , by the fashion . Just press the links above .
Here are some advantages of taking root cuttings.
It gives us a reason to be out in the garden.
We can take the root cuttings in the absolute off - season for gardening , from November until February . This is when the plants are dormant and we can touch the roots without disturb the plants too much .
This is also when the level of carbohydrates is reduce in the roots . As soon as the plant starts labor out buds in bounce , the vigour will be redistribute to these sprouts and taking root cutting will be less efficacious .
Root cuttings don’t require much maintenance.
In every single article I ’ve ever written about propagation , I include a incision on maintenance and aftercare of the cutting .
The practiced news is that root cutting do n’t want much . Since the rootage sections are dormant , they really do n’t demand water , save for a bit of moisture every calendar month or so . They do n’t have leaves , so they do n’t require sun . It ’s wintertime , so they do n’t require heat .
It ’s essentially a set it and ( almost ) bury it method of propagation .

Woody roots have all the stored energy they need to sprout again after we cut them.
Root cuttings can give us a large number of plants.
When wepropagate from root film editing , we have to make certain we get enough folio nodes to start spring up roots and to father new sprouting .
That ’s not necessary with root cut , since we ’re already propagating the roots themselves . As long as the root are thick enough to salt away sugar for growth ( we ’ll fall back to this by and by ) , we can take as many cuttings as we want .
It’s a good way to break the foliar infestation cycle.
There ’s no hint of foliage in our base cuttings because , well , they ’re roots and because we take them in the cold season when the leaves have already hang and the flora are stripped .
For this rationality , the likeliness of go past down foliar pests and pathogens is much lower with this method acting of extension . This is super utilitarian when we want to divvy up our plants with others without sharing the diseases as well .
What plants can we propagate from root cuttings?
Before we move on to our etymon veer tutorial , have a tone at the list below . I ’ve tried to include as many popular works as I could recover . And you may notice that not all of them post root contrabandist .
Herbaceous plants (Perennials and biennials)
Oriental poppies ( Papaver orientale )
Bear ’s knee breeches ( Acanthus mollis )
Asters ( Doellengeria , Eurybia and Symphyotrichum )

Joe Pye Weed (Eutrochium) is one of the perennials I’m propagating from cuttings this year.
Nipponese aster ( Kalimeris pinnatifida )
Cardoon ( Cynara cardunculus )
Joe Pye weed ( Eutrochium )

Echinops has hardy roots that can be used for propagation.
Hollyhocks ( Alcea rosea )
marvellous phlox ( Phlox paniculata )
Globe thistle ( Echinops )

Barrenwort ( Epimedium )
Bleeding heart ( Lamprocapnos )
Mums ( Chrysanthemum )

Comfrey ( Symphytum officinale )
Sea Buddy Holly ( Eryngium )
cover flowers ( Gaillardia )

If you’re lifting the entire plant, dig as wide as possible around the root structure.
Windflowers ( Anemone )
Nipponese anemone(Anemone hupehensisorAnemone x hybrida )
Mullein ( Verbascum )

Or simply dig around the base of the plant until you find woody roots.
Tooth - leaved primrose ( Primula denticulata )
Blue stars ( Amsonia )
Colewort ( Crambe cordifolia )
Trim as long a length as you can reach.
Shrubs and vines
Nipponese quince ( Chaenomeles )
Bottlebrush buckeye ( Aesculus parviflora )
Aralia shrubs
Scrape off a bit of the protective layer. If it’s white, the roots are still alive and good for cuttings.
Common fig tree ( Ficus carica )
Rose of Sharon ( Hibiscus syriacus )
Glory arbour ( Clerodendrum )

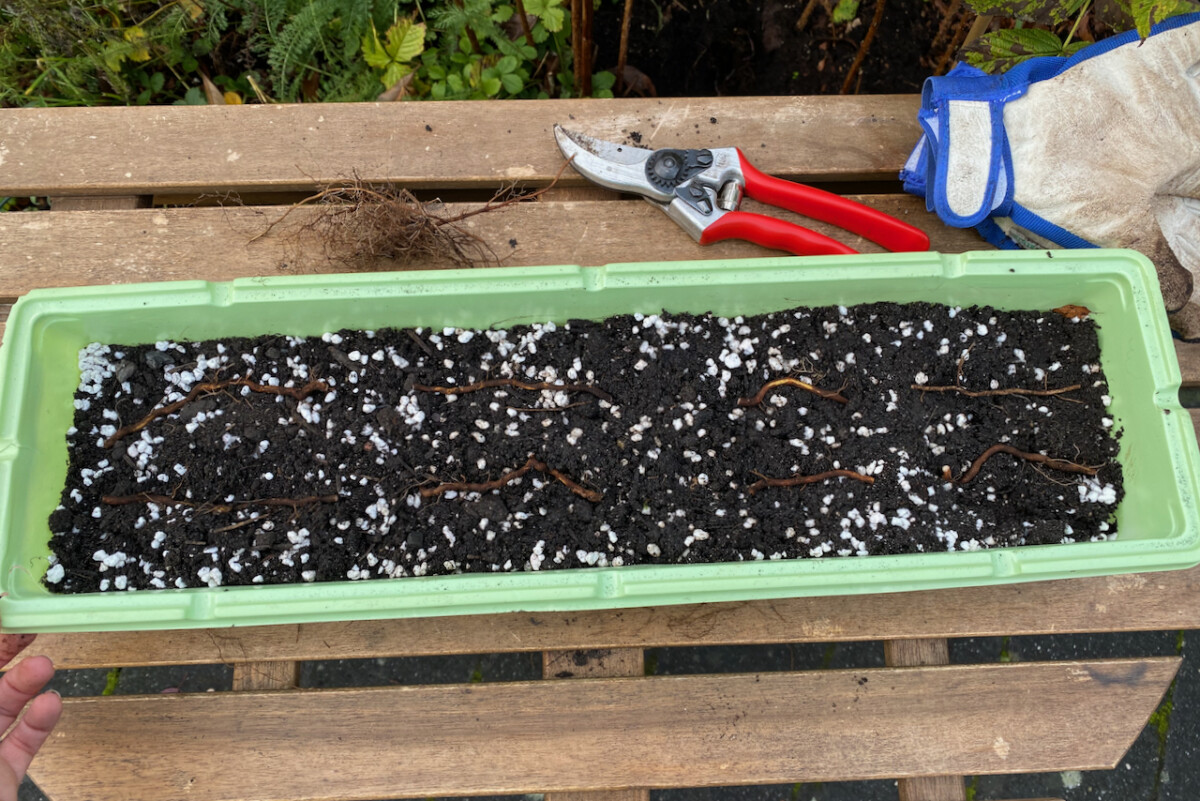
This should fill up the propagation tray.
Panicle Hydrangea ( Hydrangea paniculata )
Mock Orange River ( Philadelphus coronarius )
Golden rainfall trees ( Koelreuteria paniculata )
The same roots, divided into the right length.
Oregon grape Charles Hardin Holley ( Mahonia aquifolium )
Pussy willow ( Salix discolor )
Raspberry ( Rubus )
This simple piece of root will turn into several new plants.
Blackberry ( Rubus )
Dogwoods ( Cornus stolonifera )
Lilac shrubs ( Syringa )
Press it down to have an even surface.
blush wine , but only nongrafted ones
Sumac ( Rhus typhina )
Bleeding glorification bower ( Clerodendrum )

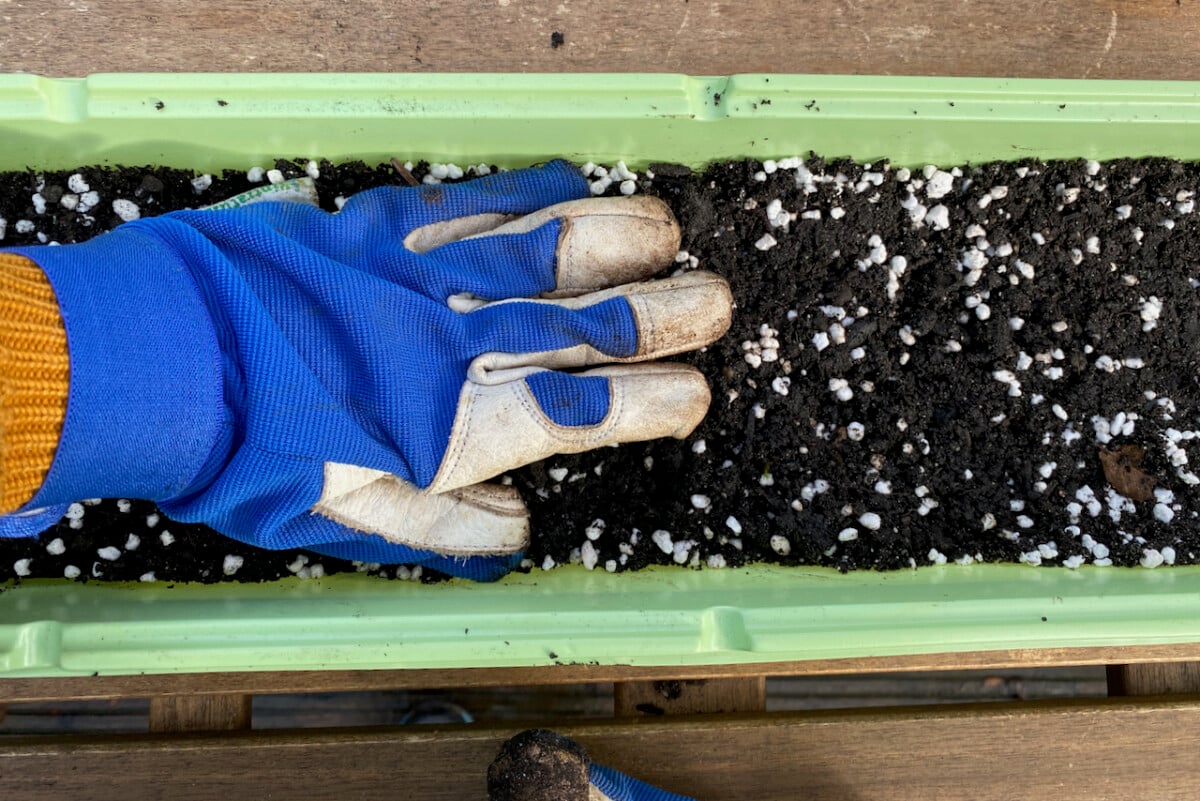
Place the cuttings on the soil horizontally.
Passion vine ( Passiflora )
Sophora shrubs
Trumpet vine ( Campsis )
Don’t cram them in too much.
Osage orange ( Maclura pomifera )
How to take root cuttings
Now that you know what plants will circulate from root carving , here ’s how to take them step - by - step .
I ’m propagating a Joe Pye Weed roots ( photo above ) and some red Bronx cheer . I ’ll show you some picture to demonstrate this method on the raspberries because we can see the ascendent better .
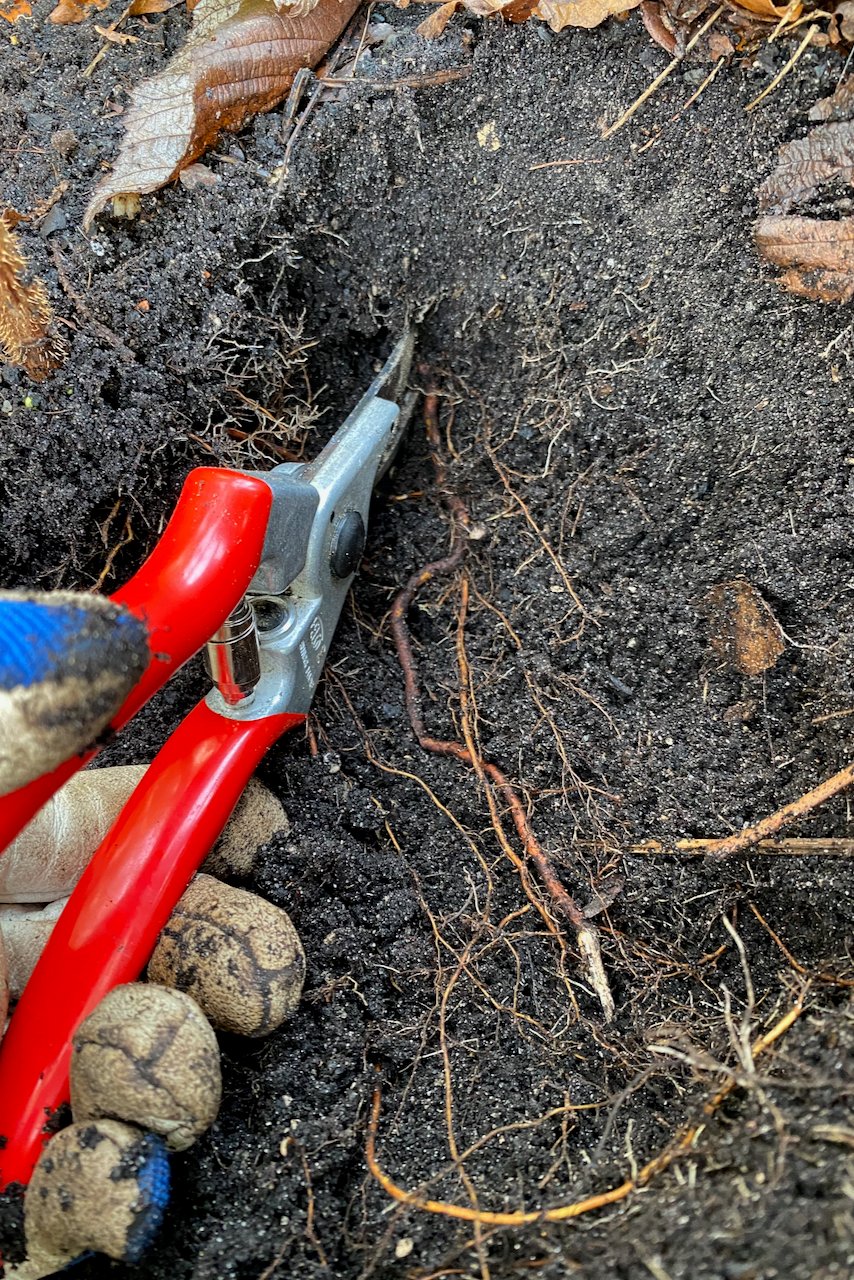
Step 1: Access the roots.
acknowledge that I did n’t just say “ toil out the roots ” because we can do this two ways .
If we ’re planning on transplanting the plant OR if the industrial plant is due to die anyway ( such as a biennial in its second class ) OR if the roots are hard to access any other way , we should just go forwards and vacate up the integral root clump .
This will give us better access to the roots and we ’ll be better capable to see what we ’re doing . But uprooting everything is not altogether necessary .

Cover everything up with more soil. They are roots, after all, so they need to stay under ground.
I was relocating my Joe Pye Weed ( Eutrochium)anyway , so I plagiarise it altogether .
The second method acting for get at the roots is to simply moil around the industrial plant that we ’re propagate until we get to roots that are expectant enough to take cuttings from .
This method is much more virtual when we ’re propagating large perennial and bush , which would be very awkward ( and wholly pointless ) to raise .

A cover will keep the moisture in and the rain and snow out.
What roots work best for propagation?
That depend on what plant you ’re circularize . I ’ve seen the phrase “ pencil - thick root ” used a lot in other tutorials , but that ’s simply not workable for most plant .
If you ’re taking ascendant cutting from a mature shrub , sure , you may be able to witness roots as boneheaded as a pencil or your pinkie finger . But for herbaceous plants , that ’s but not what we ’re working for .
And again , if you ’ve ever tried to displume out remnants of mint industrial plant or bear ’s breeches , you already know that the thickness of the root is not an indicant of how viable that root is for propagation .
Thinner etymon will be sufficient as long as they ’re thick enough to have stack away enough sugars and carbohydrates to withstand winter quiescence .
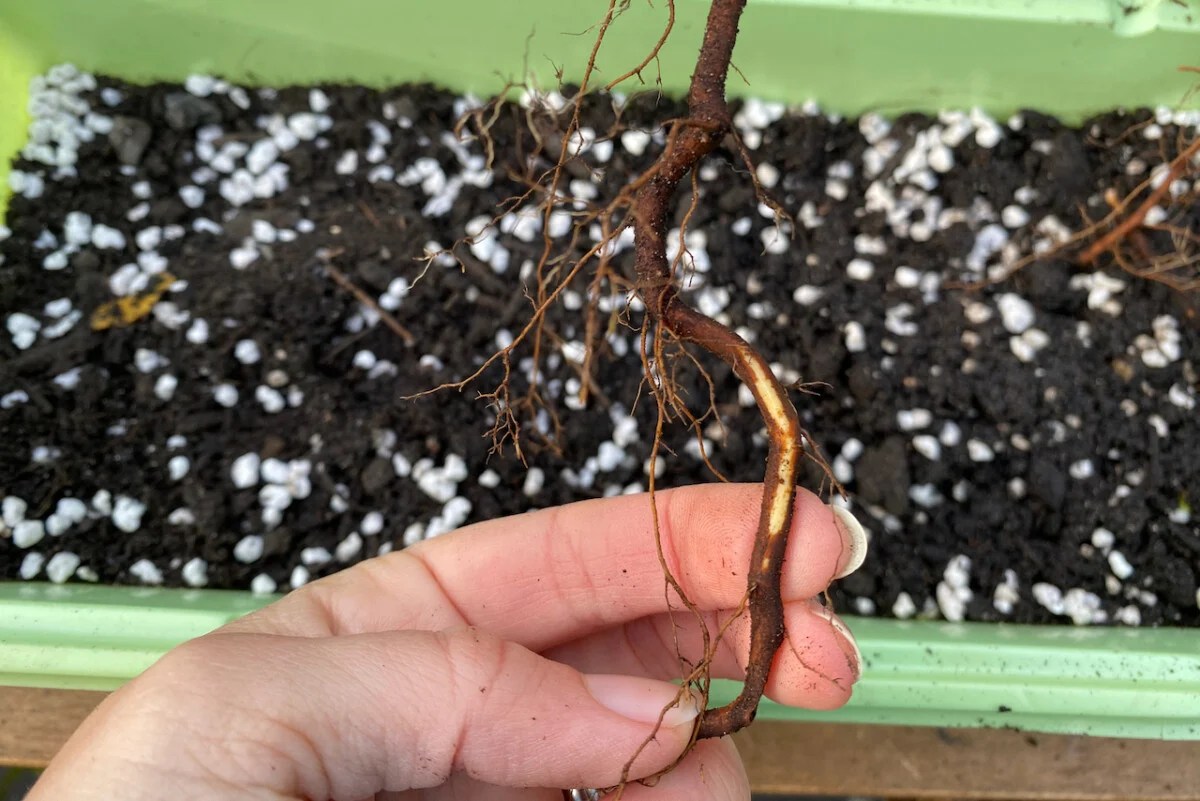
The roots have to be fleshy ( not ironic ) and pliable ( not brittle ) . If in doubt , use your fingernail to scrape a chip of the protective layer off the source . If it ’s white or lightheaded green underneath , the roots are alive and ready to use .
Whether you ’re taking cuttingsin situor digging out the plant , do n’t cut off more than a third of its root system . Taking too much wo n’t kill the mother - plant , but it might set it back and peradventure hold up flowering .
And if you removed the intact clump , remember to replant it as soon as you ’re done with the propagation jobs .
Step 2: Cut and prepare the roots.
Just like with stem cutting , we ’ll take a longer cut than we ask ( if available ) , then separate it into small sections . cut down them off as close to the pennant as potential . This is where the root is the blockheaded . And if you ’re propagating a shrub that ’s planted in close proximity to other bush , dig as near as potential to the crown , just to make extra indisputable you ’re taking material from the right works .
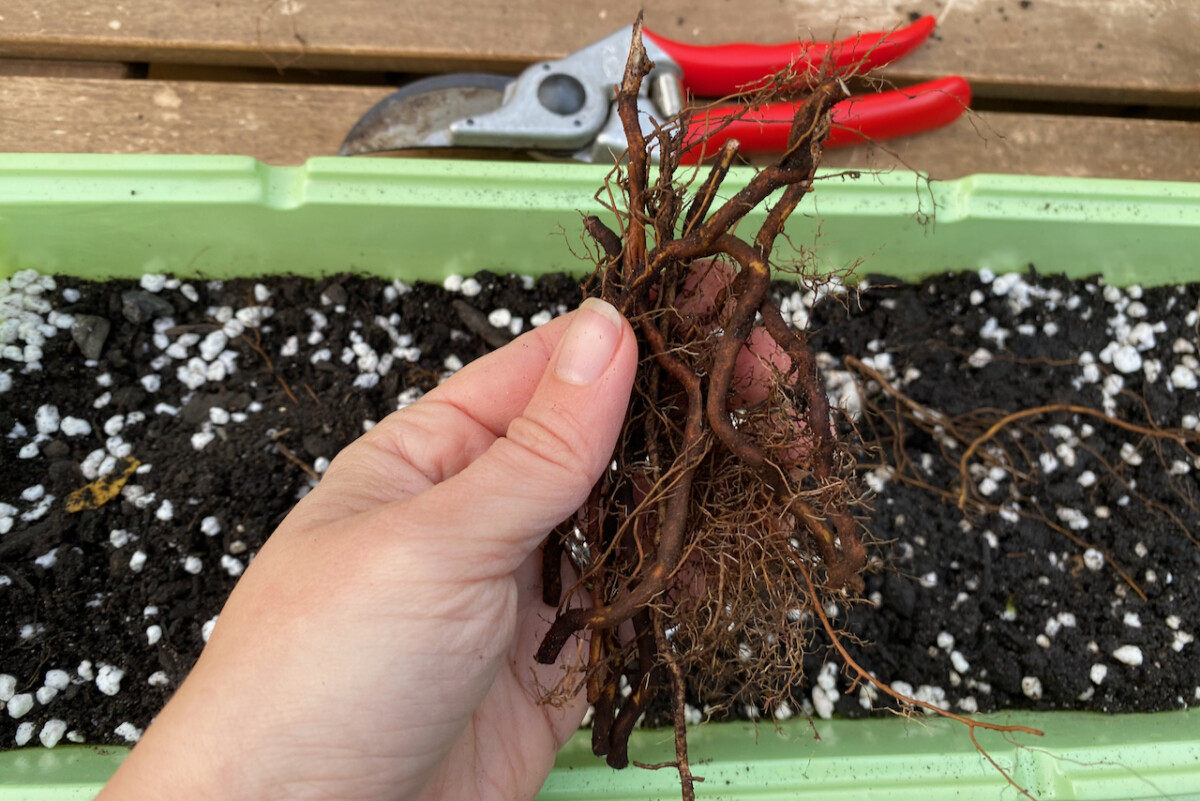
Here ’s what I ’ve engender to influence with .
These are a few long root coiled together . Each root will give us at least a couple of cutting .
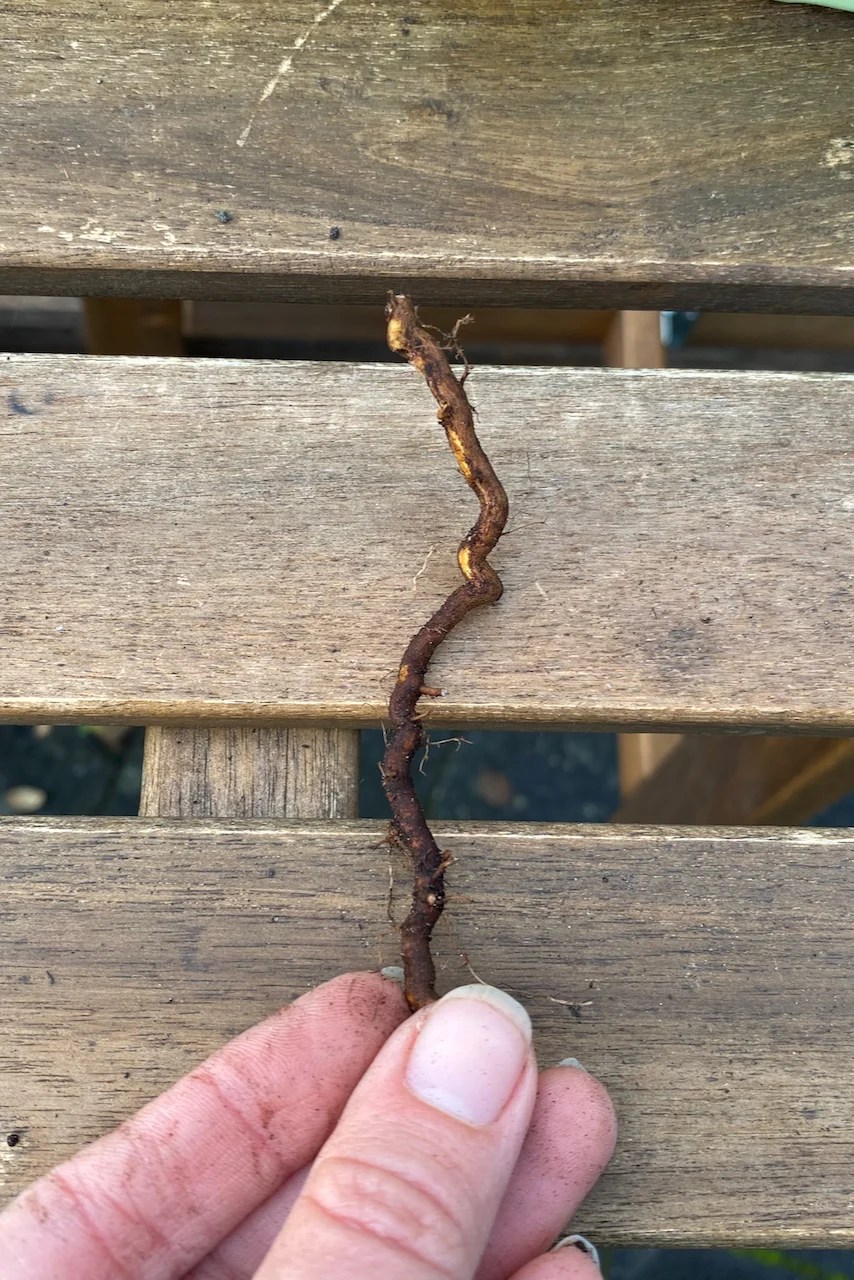
First , we ’ll remove the thin origin final stage , if any . Then we ’ll cut each beginning into lengths of about 2 - 5 inches ( close to 5 - 12 centimeter ) .
Remember it ’s all about food reserves ( stored sugar ) . So the lean the root , the longer the duration . Super slight roots such as Japanese sea anemone , garden phlox or tooth - leave primrose will need to be on the long side , just to compensate for how sparse they are .
Thicker roots , such as those of hollyhocks , bear ’s knickers or sea holly can be propagated from shorter lengths .
Once we have our lengths ready , it ’s prison term to make clean them up . Remove all the fibrous roots – they ’re feeding roots and they will not regenerate . If the roots are gnarly or bend in weird ways , essay to get some straight pieces out of them . ( It will add up in ready to hand , but it ’s not of the essence . )
Here ’s what an single root cutting will wait like :
Step 3: Plant the root cuttings.
Let ’s get the generation container ready first .
I apply steady garden compost with a quartern to a third perlite sum to the mix . you’re able to also use horticultural sand , coco coir or vermiculite in place of perlite . It ’s really substantive to supply bulk without supply too much compost that might stop up staying too fuddled .
I then water the soil and press it down to remove any air travel pockets .
Also , do n’t fill the container to the rim at this point because we ’ll need to add more grunge later . Leave a margin of at least a couple of inches .
Here ’s where the fun part starts because this is where root cuttings and stem newspaper clipping dissent . With stem cuttings ( both deal and hardwood ones ) , we would just stick them in the ground vertically . With stem cutting , we ’ll lay them on the growing medium horizontally .
That ’s why I ’m using a long and flat propagation tray . You may also use regular pots or single - bow propagation raft depending on the number of cutting you ’re taking .
localize your antecedent cutting loaded with the dirt , create certain you provide about a couple of inches around each one on all incline . Less if fine , if you need the space to fit more roots in , but make certain they do n’t touch . New growth can issue from several places along the beginning , and you do n’t want to cram them too much .
Once all your root cuttings are in berth , cover everything up with another layer of pot intermixture . I ’ve also meet other gardeners use grit or sand for this final stratum of the “ cake . ” You do n’t need much of a top screening , just about an inch in pinnacle should do .
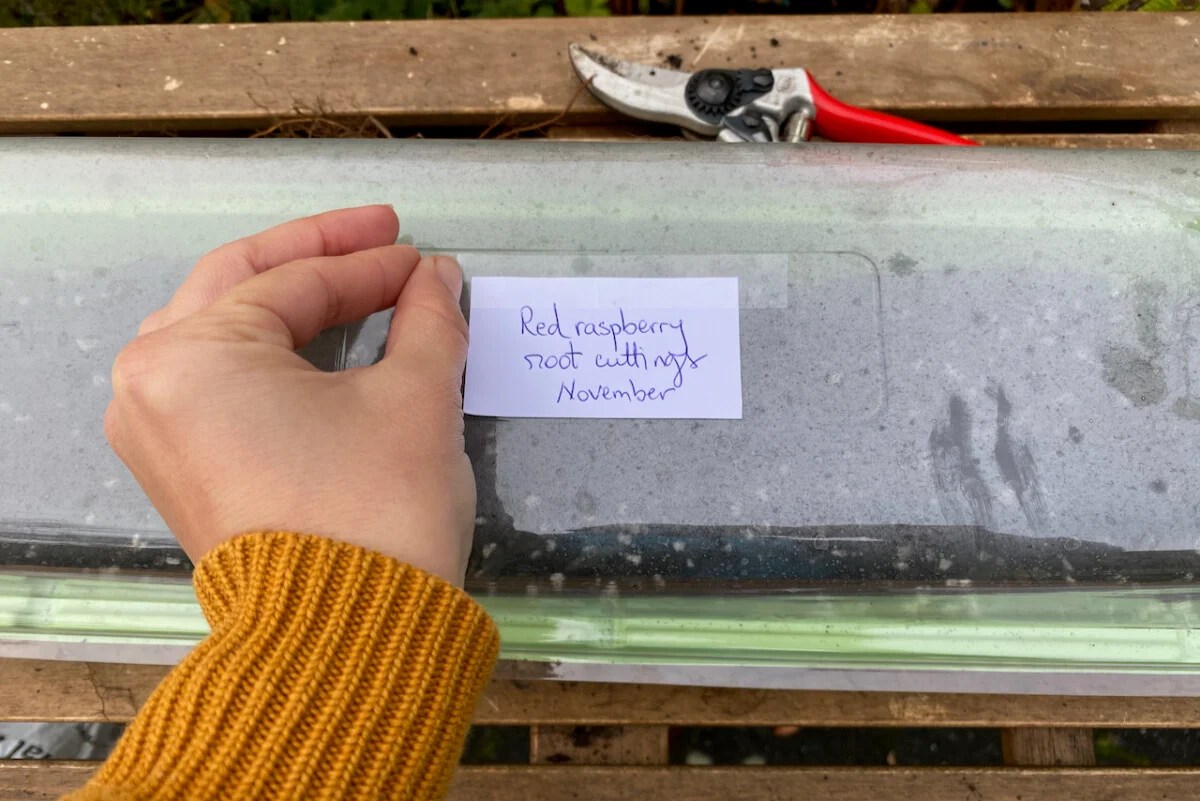
you may irrigate it again , very light , then pass over it up with some clingstone enhancer or a plastic bag . I ’m using the lid of the multiplication tray .
Step 4: Aftercare for root cuttings.
Just josh , I tell you there would be very little maintenance for root cuttings . All you need to do at this point in time is place them in a cold flesh , greenhouse or enclosed porch to keep them away from the constituent – no rainfall , no coke and preferably no hard frost .
And since you wo n’t be able to tell what ’s in the container until the Modern growth start showing up , verify to label the tray . I ’ve added the calendar month too because I ’m plan on taking more radical cuttings in February .
By next leaping , you will protrude see signs of outgrowth . Some plants will grow roots first – straight down – while others will also sprout leave-taking . Make indisputable you remove or raise the protective charge card cover once the young shoots appear to make way for their ontogeny .
Remember that these are sister plants , so give them the same treatment as you would baby seedlings . When spring roll around , endeavor to get them acclimated to the temperature , humidity and sunshine outdoors by expose them gradually .
you may separate out the new baby plants by - mid fountain and move them to their private containers . Then plant them in the garden – or share them with friends – by the undermentioned dusk . If the industrial plant have several sets of foliage , you’re able to also skim potting them up and move them directly into the garden .
And as a net monitor , did you remember to put the mother - industrial plant back in the primer coat and cover the exposed roots ? Give it a bit of piss to remove the aura pockets and help it ensconce back in .
