Related
I love to display unique lighting on my deck and tend towards solar lighting options , but often ascertain that many do n’t stand up well to brave out . I also lay away coolheaded old thing ( detritus ) to craft with , and had been wondering what to do with an old eat out crybaby water boy for years . The bottom became a planter long ago , but the hood was just hanging out evading creativity .
Until I visualize out what a great hanging illumination it would make . The estimation is simple enough and , with the right tools , the job was n’t that toilsome either , although it did take a bit of time due to the size of the labor . If you have any cool detritus hanging around , for about $ 10 you’re able to receive acool solar lightto role and make yourself a totally individualize hanging ( or otherwise ) lighting source for your pack of cards or patio .
What You Need:
Metal Container of Some Sort
Obviously this is going to be the master part of your undertaking . I had an awesome sure-enough aluminum top to a volaille water boy that has been hang out in my garage await for a project . you’re able to use a variety of different things for this , such as old coffee cans , heat lamps , or anything that has a unspoilt shape to create a hang ( or even board top ) light .
Hanging Solar Light
The whole intent of my undertaking was to make a hang light for the pack of cards or terrace and I felt a good rechargeable solar light would be the undecomposed pick . you could apply any issue of things to light up your foundation , including candle . I choosethis lightsince it bear a commission , includes a remote control , and recharges easily with a unpluggable panel that has a long cord for placement in the sunshine . This way I was n’t restrict on where I could put it .
Stencil or Guide and Tape
Unless you want to freehand a design , I strongly suggest you impress out what your invention is to serve as a guide to tape it to your work surface .
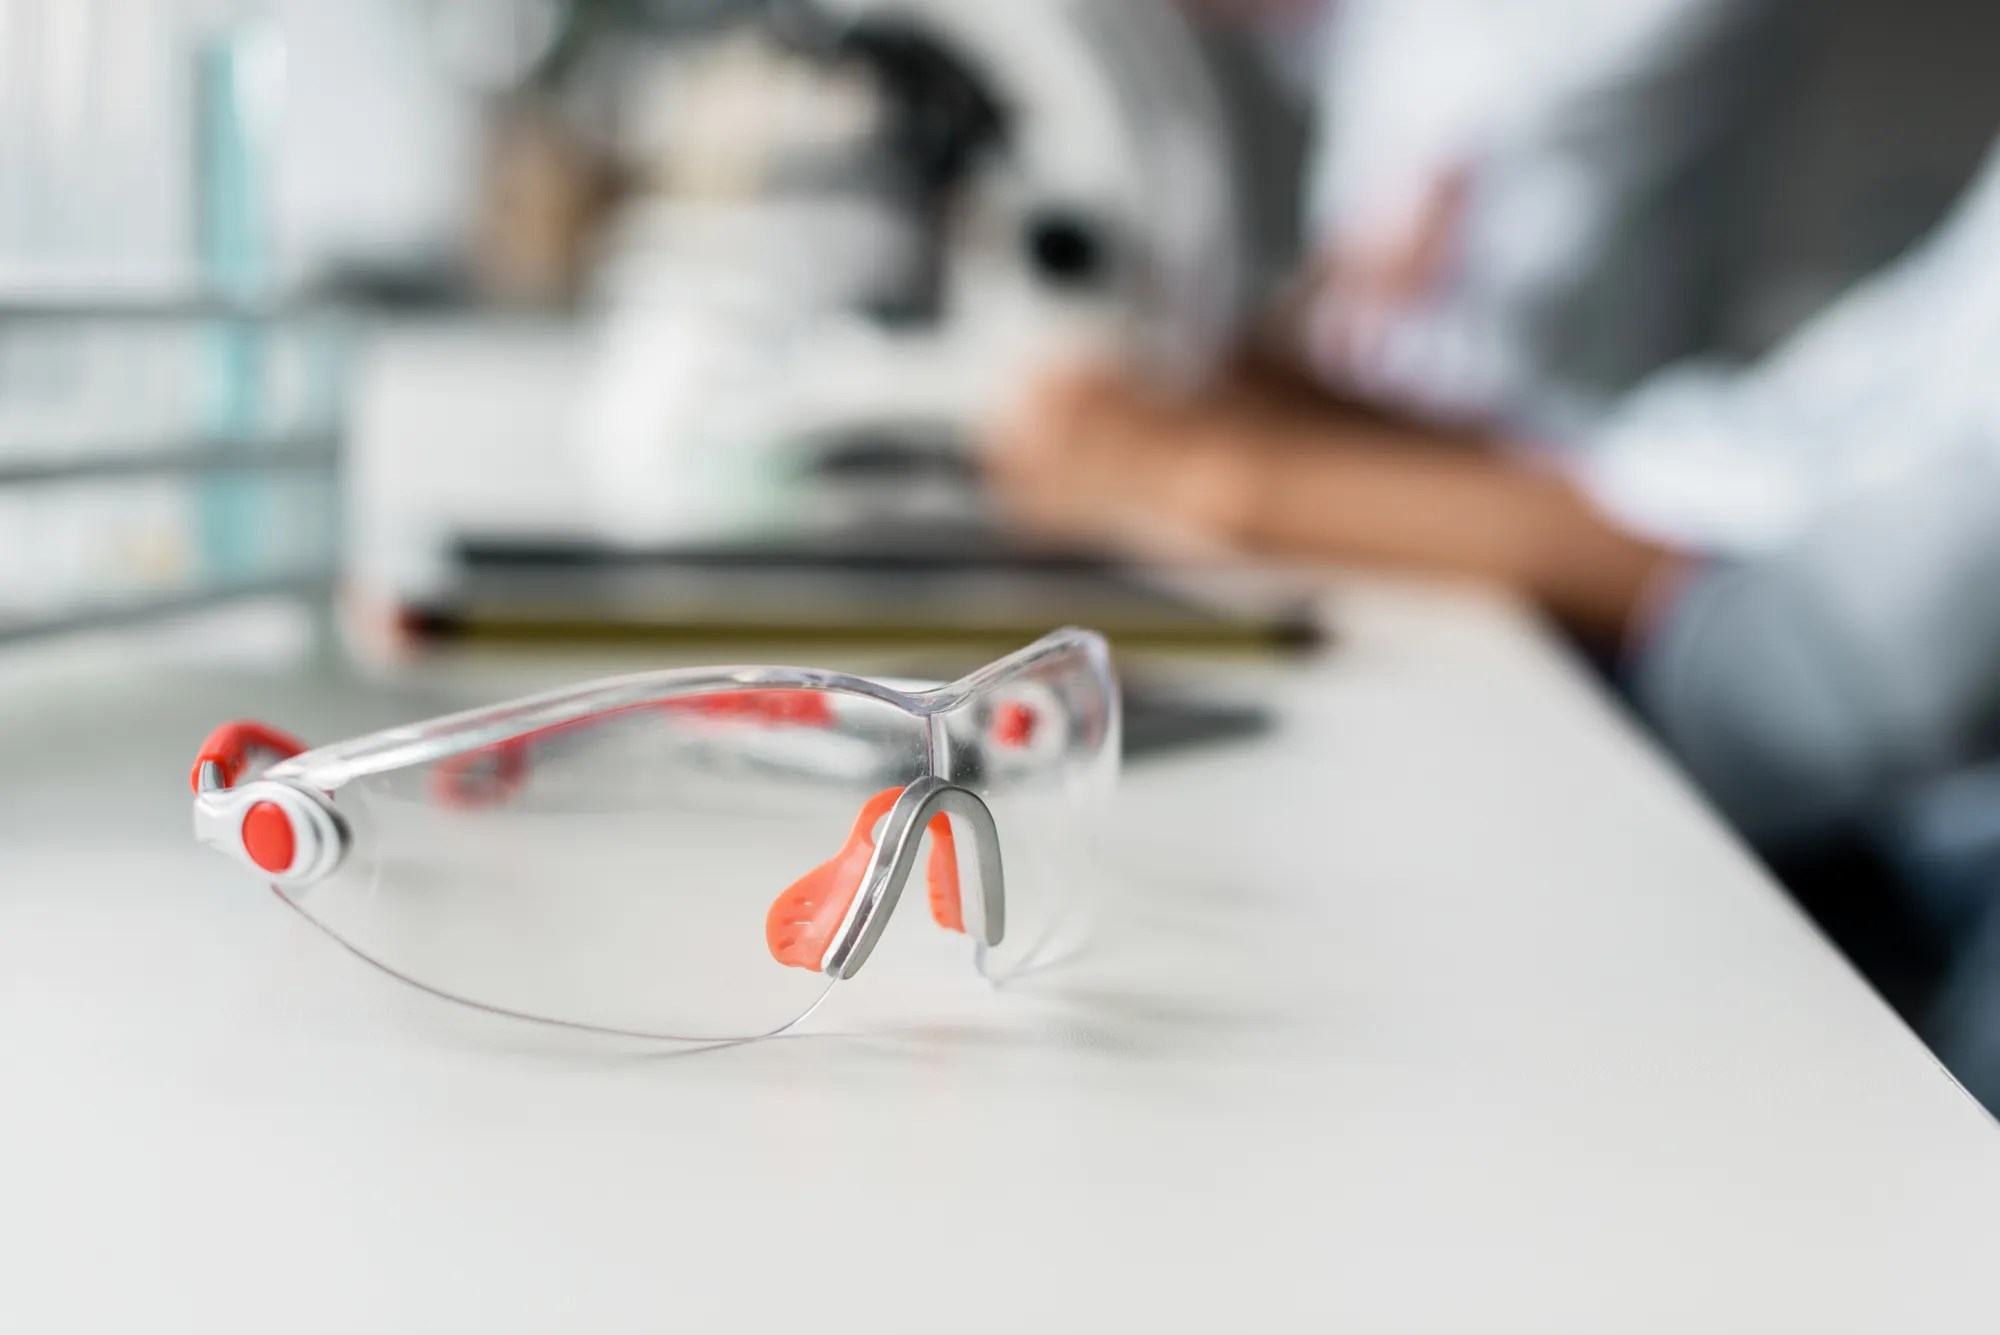
Safety Glasses
Seeing as that you are solve with a exercise and metalwearing safety glassesis a safe approximation as the exercise can skid and small pieces of metal will be present as well .
Work Gloves
This project is endure to create some sharp edges as well as small bit of metal that can easy embed themselves in your paw . Plus , you will most likely want to abide region you are advertise against and will want to protect your hand against any slips of the practice session .
Cobalt or Titanium Carbide Drill Bits
Either of these practice session routine options are fantabulous for asmooth movement through any sorting of metal(in fact , they can handle some pretty slurred poppycock ) . I require sodding ascendence over my hole without have to employ too much pressure . pick out the sizes you finger are best for your project ( I suggest receive more than one sizing ) .
Power Drill
Any dependablepower drillwill work ! I prefer a cordless and just make indisputable keep my batteries rotated through the charger .
Metal File
Unless you want a roughly edge look , a good metal Indian file can facilitate you polish out , flatten , and shape your cuts .
Optional: Sawzall w/ Metal Saw
I originally matte that I might want to take advantage of asawzallto create my geld out area or smooth the sides . count on what you are form with , and how sturdy it is , this might be a in force choice- however , in my shell it was not . I did not have enough purchase or a hearty enough metal to work with to do this safely .
Optional: Magnet
The day I take on this projection the weather exact a nasty go so I make up one’s mind to work indoors . Even though I circulate out a driblet cloth to work on I still had minute of metal everywhere . preserve a proficient magnet close by was implausibly helpful in pull up any pocket-size number that had blown or brush off while I worked ( I merely used a wide icebox attraction ) .
Optional: Bucket
A topographic point to underprice metallic element shavings and direct any torn newspaper is also helpful . A little pail used as a portable trash have me separate out anything I wanted out of my manner easily .
Steps
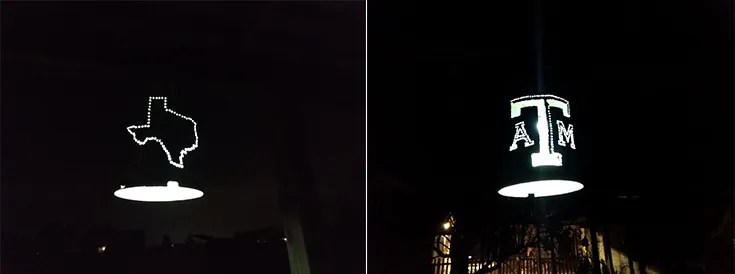
Step 1: Print Out Picture and Tape Securely
I was create my light as a gift , and definitely need to have a sturdy guide as this was a new attempt at a unexampled idea to keep from make any major mistakes . I find my patterns easily enough with a quick online search and printed them for personal use ( no copyright were violated ) .
patently the motion picture itself does n’t have to be perfect and you should definitely pick out a simple , silhouette eccentric design as you ask to consider how your stinger will fall and you do n’t desire to impart behind a flimsy aerofoil .
wind to Consider : Tape your stencil down securely as the drilling and filing will begin to tear it . Add more tape as take , and remove surface area that are completed to help debar extra tears .
Step 2: Drill Out the Outline
Once your stencil is unafraid get to outline with the practice . I used my bombastic bit for the black field because I plan on take that entire segment out and wanted to withdraw as much as possible from the start . Creating an outline appropriate me to join together holes and follow up with a smaller bit to cut it out totally .
Tips to count : Do n’t concern about any pocket-size strays you may make from the line . When you follow up with a file you may smooth these out as much , or as little , as you need . If you are looking for a more shot - out look like I was , then make some variations in the line for summate pastime .
Step 3: File Off Edges and Shape or Smooth as Desired
A good metal file cabinet will help you wear down any crude sharpness you have and sharpen niche . It may seem like not much is happening at first , but keep at it and alternate it with a smaller notched data file to get your desired outcome . I smoothed mine out but choose to keep some rough patches for added sake .
Tips to Consider : take off with a smoother saw-toothed single file to create a more executable Earth’s surface that you could add up at with a more fast-growing file later . I found that when you started with a more aggressive tooth it caught on the alloy and was counterproductive .
Step 4: Cut Holes in Top to Fit Your Lighting Option
I have no idea how I did n’t get a serious picture of this , but it is a minuscule , authoritative whole step to hang your light and accommodate your solar light . My container had a handle on top for hanging , but not inside for the light . Two lowly holes and a little telegram was all I needed to make a simple crossbar to fall my hang solar illumination from the interior ( the light I buy has a footling hanging hook already ) . Since the light also charges from a plug in panel I exercise a hole to accommodate that conducting wire if we did n’t want to remove the visible light for accuse .
Tips to believe : To keep from creating too turgid a hole from the start , simple drill a pickle and then slowly shave away the edges to get the perfect paroxysm .
Step 5: Apply Light, Hang, and Enjoy!
Once you ’ve finished off your Light Within it ’s metre to cling and bask ! I wish the versatility of this particular container as it can also sit on a table top for illumination .
Conclusion
This emphatically was a projection that I check from as I went along . Poking holes in atin can for little solar lightswas child ’s play compare to the size of this , and I suggest doing it in sections and give yourself a rest . The pressure from the practice quiver gave my subdivision a exercising even though the moment moved smoothly through the aluminum !
plainly you could opt your own size visible light option from the fabric you have , but overall the summons was jolly easy and the learning curve ball was quick to feel out . unlike molded container and metal will respond otherwise to your body of work , but I do evoke a easy Al like this choice - just be deliberate of how easy it can bend when you set any violence against it .