If your basement ’s masonry walls have accrue into disrepair , do n’t eat into . Repairing and repainting the surface can be done in just five step .
make over a basement wallcan need a small more work than a standard interior paries . Not only do you involve to piece the perfect rouge colour , but you may be working with an unfamiliar fabric , such as masonry brick . Most importantly , before heading to the key fund , you ’ll need to check that your wall are waterproof . To do so , it ’s important to know the most uncouth type of water damage . Then , follow our stone’s throw - by - step guide for repairing and repaint a cellar Freemasonry wall .
Before You Begin: Check for Water Damage
To check whether your basement is waterproofed , start by learning the most common case of water damage . Condensation , the mild form of water system trouble , does n’t originate on the outside . It forms when the cooler temperatures of H2O pipes and bulwark condense the moisture from warm - weather breeze and leave it on the airfoil . increase the respiration , insulate the pipes , or installing a dehumidifier will lighten condensation .
To insure seepage from groundwater , set up newfangled gutter or fix the existing ones , and slope at least 4 foot of the grunge away from the foundation so that water race out and does n’t seep through the rampart . seal the interior surface of the walls with hydraulic cement and patch the gob can also heal some oozing problems . If neither of these methods work , confer a drainage medical specialist .
Once you ’ve ensured that your basement is pee - cockeyed , it ’s time to paint . Expect to pass about an hr prepare and painting a 6x8 - base wall , not counting dry meter require for repairs . Before you begin , check that you fuck how to brush walls , key crack , and apply liquid waterproof agents .

What You Need
Step 1: Remove Debris
Using a conducting wire brush , hit as much loose mortar and key as you could . Remove efflorescence with muriatic acid , following the maker ’s instructions . Rinse the wall and allow it dry .
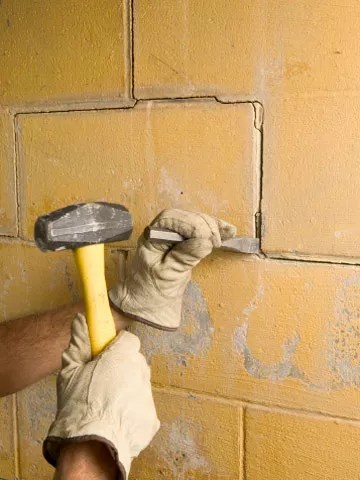
Step 2: Key Cracks
Using a minuscule sledge and cold chisel , key the shot in the rampart — hold the chisel at an angle and undercut the border of the sally so the bottom of the whirl is wider than the opening . Keyed fissure help keep the patching cementum in place . Vacuum the crack to remove the dust .
Step 3: Apply Cement
If the area is not already wet , mist it with a spray bottleful . Then force a little amount of hydraulic cement into the crack with a trowel and smoothen it down . Also use hydraulic cement where the wall meets the floor .
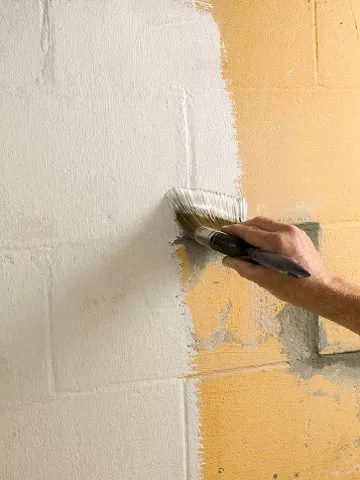
Step 4: Apply Paint
When the hydraulic cement curative , brushing on two coats of a in high spirits - qualitymasonry or waterproofing key .
Step 5: Apply the Final Coat
For the best results , apply the first coat with a nylon or polyester bristle brush , the second pelage with a brush or Freemasonry roller . play the paint thoroughly into the pores of the Freemasonry , then back - vagabond the country . Roll a second coat over the paries . If you notice oozing after several days , lilliputian pores or pinhole are still subject . Apply an additional pelage to these arena .
Be sure to open up windows and use an fumes fan to provide enough airing . Where secure mark - ventilation is not possible , a rubber-base paint Cartesian product might be less noxious .