Get a streamlined workspace and a ton of newfangled entrepot space ( plus that high - final stage built - in spirit ) , all with one mere IKEA Pax hack .
Blaine Moats
sour a white wall into ahardworking household officewith this DIY built - in workstation , which takes a distich of authoritative IKEA Pax wardrobes and hacks them to look more high-pitched - final stage — and to underpin a desk . This IKEA hack is full adaptable , so you may pick whatever colors , panel software , handles , desk surface , and more that you require to make the DIY to the full your own .

Credit:Blaine Moats
About This IKEA Hack
The undertaking part with a pair of IKEA Pax wardrobes , which are available in several sizes and configurations , to create shut - door storage for position supplies , paperwork , and more . Between the cabinet , a sheet of plywood mounted to the rampart forms an effective screen background open . The stock height for a desk is 30 inches , but you could set up your surface 44 inches from the trading floor for standing desk stature or 36 inches for antagonistic height .
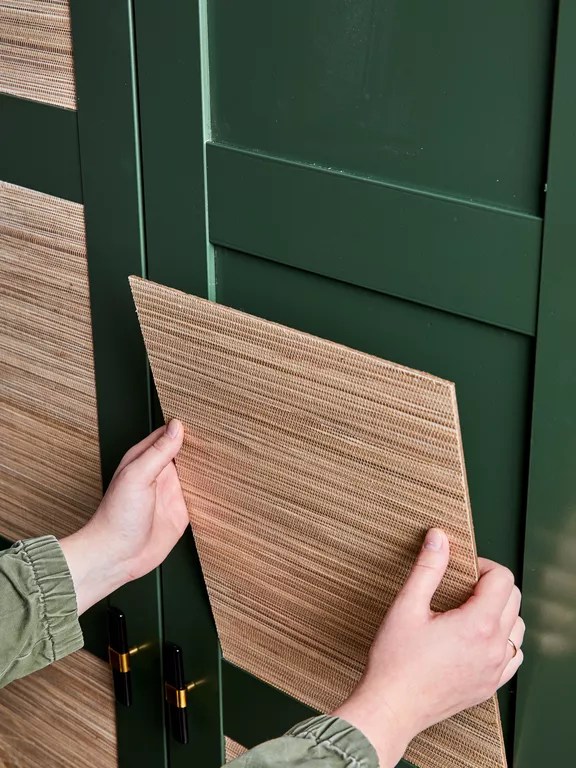
Personalize the Pax wardrobes with a coat of rouge ( we choseChimichurri CSP-810 from Benjamin Moore ) and textural wallpaper inside the door insert .
Supplies
Instructions
1. Measure and Cut Plywood
Measure and cut back the plywood to 21 - 3/4x48 inches . Cut the 1x3 into one 48 - inch - long nose firearm and two 20 - column inch cleat . These pieces will make your tabletop .
2. Assemble Tabletop
Using woodwind instrument glue and clamps , attach the nose while to one prospicient side of the tabletop with edges flush . admit to dry 24 hour . Remove the clamps , and sand the surface until liquid . bump off dust with a tacking textile .
3. Apply Clear Coat
Apply clear coat to the tabletop using a eminent - timber angle brushing . Be sure to brush in one direction with the caryopsis . Let dry for 2 hours , and then lightly sand to take away zephyr bubbles .
4. Paint Wardrobes
Using fine - gritstone sandpaper , rough up the finish of the unassembled press part and doors . pass over away dust with a weather sheet material . Prime all closet parts and the cleats from Step 1 . After the fusee has thoroughly dried , paint all the primed pieces , allowing to dry between coats .
5. Assemble and Position Wardrobes
After the pigment is cure , forgather the wardrobes according to the manufacturer ’s instructions , but leave off the doors . Position the wardrobes against the wall 48 inches asunder .
6. Attach Cleats
Measure 29 - 1/4 inch from the floor and take in a point line on both wardrobes to pock the tabletop position . Attach cleats directly below the line , have it away in from the interior of the closet .
7. Secure Tabletop
rate the tabletop on the cleats . Screw through the bottom of the cleat into the bottom side of the tabletop so as not to upset the finish on the top . To add constancy , put in the metallic element bracket into a stud poker or using drywall anchors . bind tabletop to bracket out .
8. Finish Wardrobes and Customize
add the closet door , and contribute desire hardware . Trim wallpaper to fit inside the door insets and adhere with crafts gum . Customize the Interior Department with personal digital assistant to hike storage capabilities .
Once your fresh workspace is built , you may boost its organization by outfitting the interiors with a combining of ledge , baskets , drawers , and other memory board accessories . add together undertaking firing and art around the work arena for a operative office that is n’t an eyesore .

Credit:Blaine Moats